
3CX Phone System for Windows Version 9.
3CX Phone System is a software-based IP PBX that replaces a traditional PBX and delivers employees the ability to make, receive and transfer calls. The IP PBX supports all traditional PBX features. An IP PBX is also referred to as a VOIP Phone System, IP PBX or SIP server.
Calls are sent as data packets over the computer data network instead of via the traditional phone network. Phones share the network with computers and separate phone wiring can therefore be eliminated. With the use of a VOIP gateway, you can connect existing phone lines to the IP PBX and make and receive phone calls via a regular PSTN line. The 3CX phone system uses standard SIP software or hardware phones, and provides internal call switching, as well as outbound or inbound calling via the standard phone network or via a VOIP service.
NOTICE: The latest update of 3CX introduced a feature that might block Call Requests from icttech.net. In order to solve this you need to go into 3CX, 3CX Management Console > Settings > Parameters > Customer Parameters tab , find "SEC_IGNORE_USER_AGENT" and remove "voip" from the Value Section. This only applies to 3CX V15 SP4.
|
Adding icttech.net to 3CX
Please make sure NAT is enabled on both your side and on the account you are using.
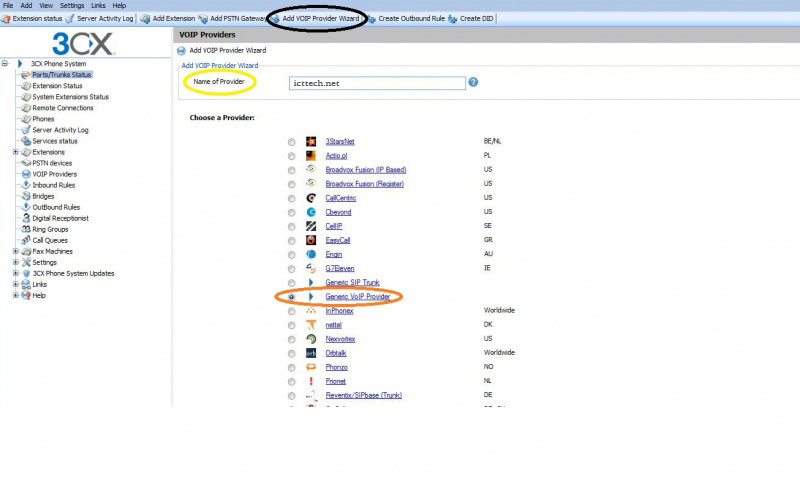
In the 3CX Phone System Portal, in the middle of the upper-part of the screen, we can see the Add Voip Provider Wizard , please click on the link. Once we are there we can put the Name of the Provider, in this case we are going to enter icttech.net and in the Provider list we can select Generic Voip Provider.
Once we already click on continue, we will see the Voip Provider Details configure it according to the following instructions:
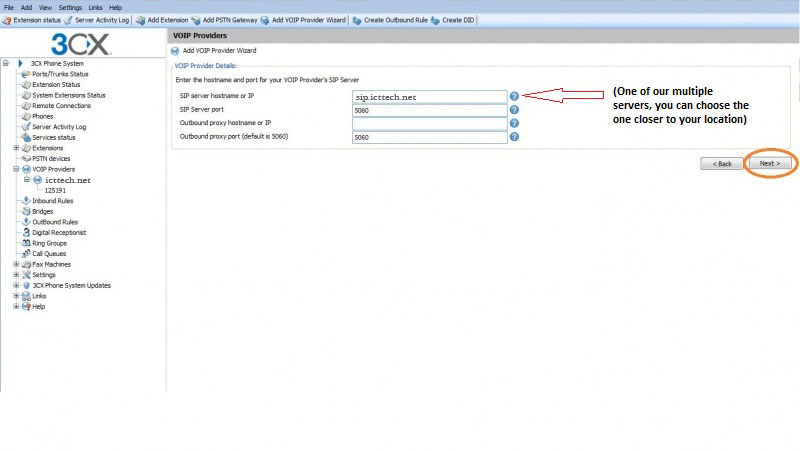
- SIP server hostname or IP: any of the 10+ icttech.net servers, all have the naming convention server.icttech.net (e.g: newyork.icttech.net).
- SIP Server port: 5060
- Outbound proxy hostname or IP: Leave in blank
- Outbound proxy port (default is 5060): 5060
For a full list of the servers and their IP's please check [Servers]
Account details section, to complete this section please do it according to the following instructions:
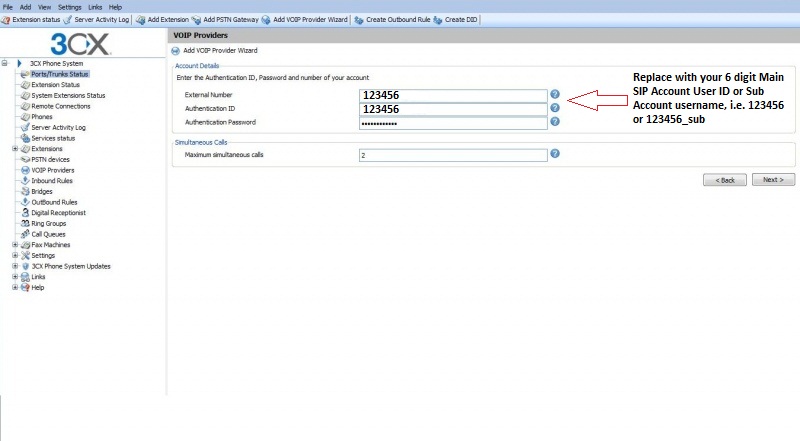
- External Number: 100000 (Replace with your Sub Account username, i.e. 123456_sub)
- Authentication ID: 100000 (Replace with your Sub Account username, i.e. 123456_sub)
- Authentication Password: Your icttech.net password assigned. (the password sent when you signup is the default SIP password too)
- Maximum simultaneous calls: Specify how many concurrent calls your account supports.
Calls Routing
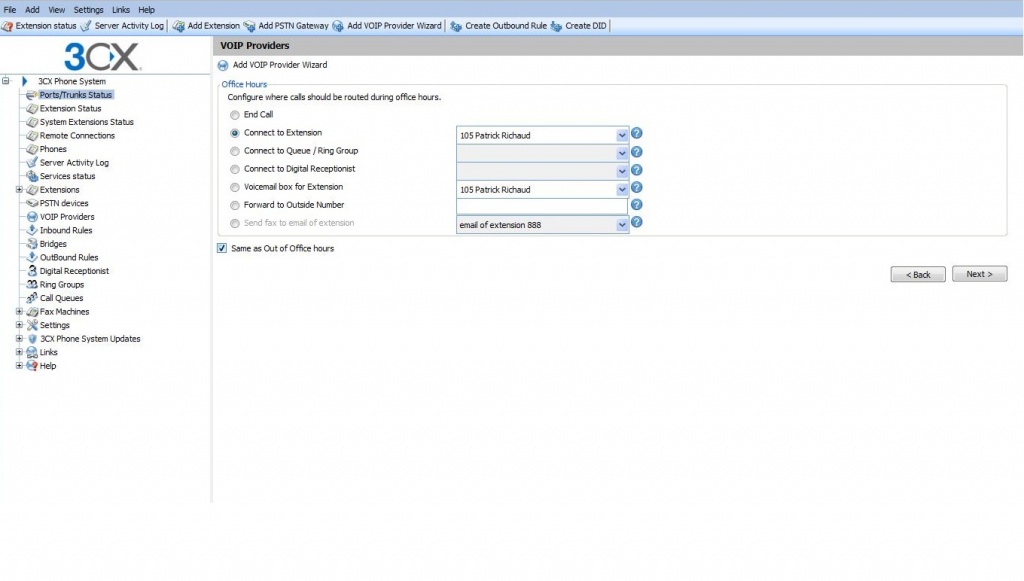
Now specify how calls from this VOIP provider should be routed. You can specify a different route outside office hours.
   End call
   Connect to Extension
   Connect to Queue
   Connect to Digital Receptionist
   Voicemail Box for extension
   Forward to Outside Number
On the next page, you will be asked for a prefix so as to create an outbound rule for icttech.net . Enter the dialing prefix in the “Calls to numbers starting with (prefix)” text box. To make calls via this provider, precede the number to be dialed with this prefix.
Outbound Rules
An outbound rule defines on which provider an outbound call should be placed,based on who is making the call, the number that is being dialed and the length of the number.
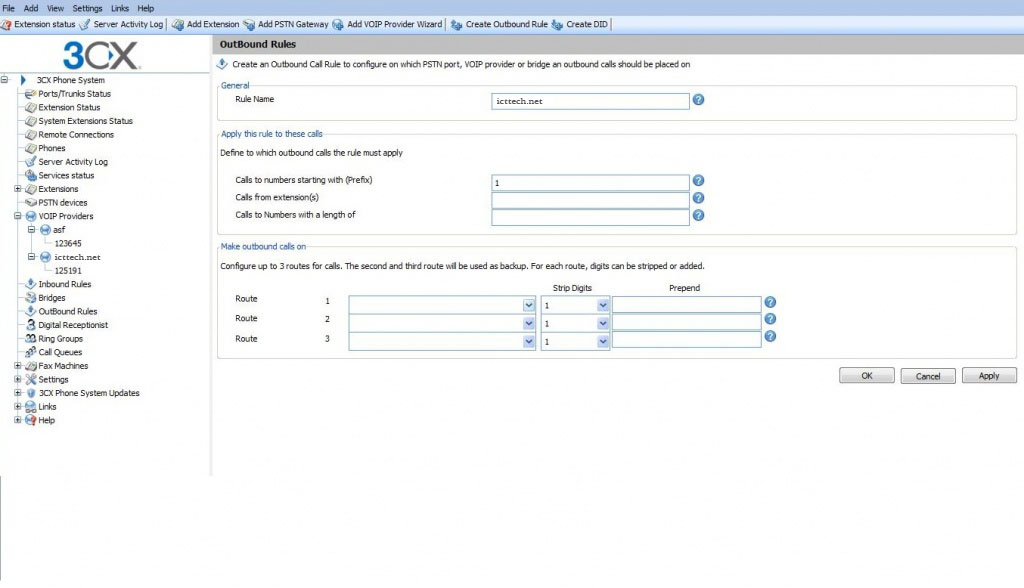
Specify for which calls to apply the outbound route. In the „Apply this rule to these calls‟ section, specify any of these options:
- Calls to Numbers starting with: apply this rule to all calls starting with the number you specify. For example, specify 1 to specify that all calls starting with a 1 (usually a prefix) are outbound calls. Callers would dial „123456789‟ to reach the number „23456789‟
- Calls from extensions: Select this option to define particular extensions or extension ranges for which this rule applies. Specify one or more extensions separated by commas, or specify a range using a -, for example 105-140.
- Calls with a Number length of: Select this option to apply the rule to numbers with a particular digit length, for example 10 digits. This way you can capture calls to local area numbers or national numbers.
- Now specify how the outbound calls should be made. In the Make outbound calls on section, select up to 3 routes for the call. Each defined gateway or provider will be listed as a possible route. If the first route is not available or busy, 3CX Phone System will automatically try the second route.
Inbound Rules
With the Inbound rules we can configure calls made to that particular DID number to go to a particular extension, digital receptionist or other destination.
The latest update of 3CX introduced a feature that might block Call Requests from icttech.net. In order to solve this you need to go into 3CX, 3CX Management Console > Settings > Parameters > Customer Parameters tab ,
find "SEC_IGNORE_USER_AGENT" and remove "voip" from the Value Section. This only applies to 3CX V15 SP4.
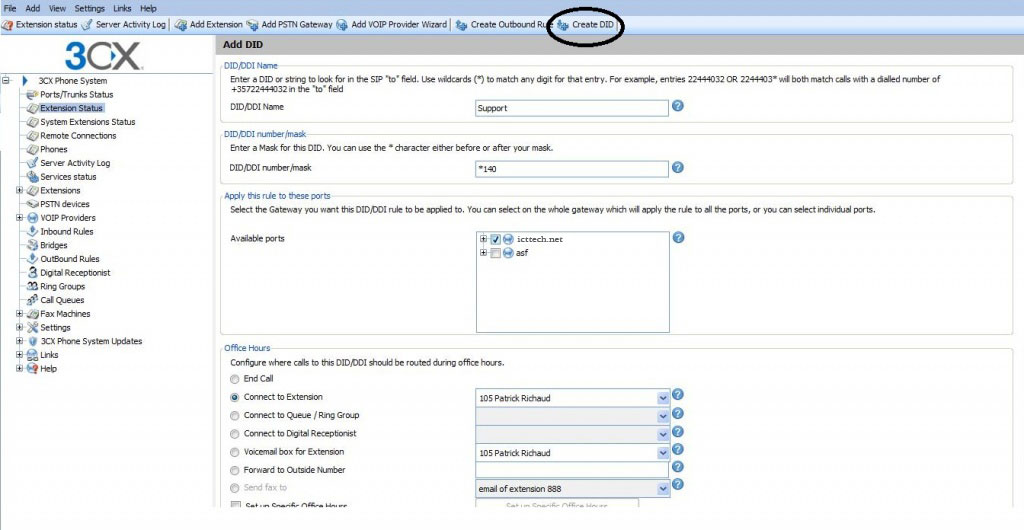
- Click on the "Create DID‟ button in the 3CX Management Console in the toolbar.
- Enter a name for the DID (for example support).
- Now enter the DID number as it will appear in the SIP “to” header.
- Now select for which ports you wish to add this DID. If the DID number is associated with multiple ISDN ports, then you must select each. An inbound rule will be created for each port that you select.
- Now specify where you wish to direct calls made to this DID:
 End Call
 Connection to extension
 Connect to Queue/Ring Group
 Connect to Digital receptionist
 Voicemail box for extension
 Forward to outside number
 Send fax to email of extension
You can specify that an incoming call is routed differently if it is received outside office hours. De-select the "Same as during office hours‟ option to specify a different route.
Click OK to create the DID / Inbound rule. The newly created DID‟s will be listed as inbound rules.
The option "Source Identification by DID" can be found Here
Creating Extensions
To add an extension, click on "Add Extension‟ from the toolbar.
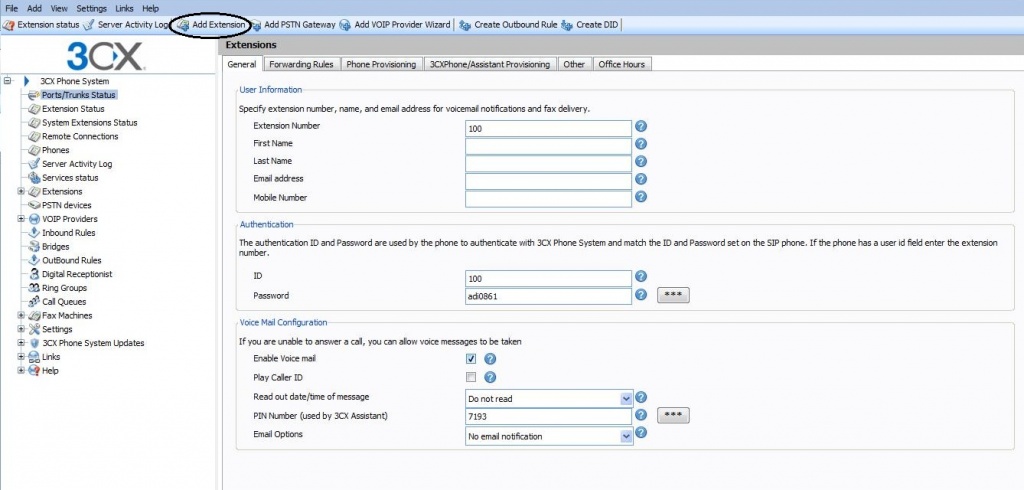
- Enter the extension number: first and last name and the Email address (Optional) of the user. The email address will be used for voice mail notifications and as the default SIP ID. You can leave the field empty if you wish.
- Now specify an authentication ID and password:
 ID – The SIP "Username‟. e.g. 200.
 Password –The SIP Password (password can be hidden from the user).
- Voicemail: You can enable different features from your Voicemail
 Enable voice mail
 Play Caller ID  – the voicemail system will play the number of the caller who left the voice message
 Read out date/time of message – the voicemail system will play back the time of the voice message to be played
 PIN number – this pin number is used to protect the voice mailbox and is used by the user to access the mailbox. The PIN number is also used
 as a password to logon to 3CX Assistant or the MyPhone User portal.
- Click OK to create the extension.
After you have created the extension, a summary page will appear, which shows the information that the SIP phone will need:
- Proxy server IP or FQDN: Host name of 3CX Phone System
- User ID: Extension number created
- Authentication ID: As specified in Authentication ID field
- Password: As specified in Authentication password field
Security Measures
We strongly recommend you to change the password in your account, PBX system and extensions on it, periodically
