
Your Basic Email account has an option to enable auto configuration of email and notes on Apple iPhones and OSX Computers;
This auto configuration can be accessed in your email settings in your control panel;
This auto configuration can be accessed in your email settings on your cloud hosting control panel;
To install a profile go to your control panel. By default it will be yourdomain.com/cpanel ( replace yourdomain.com with your actual domain name )
Once inside; Scroll down to Email -> Email Accounts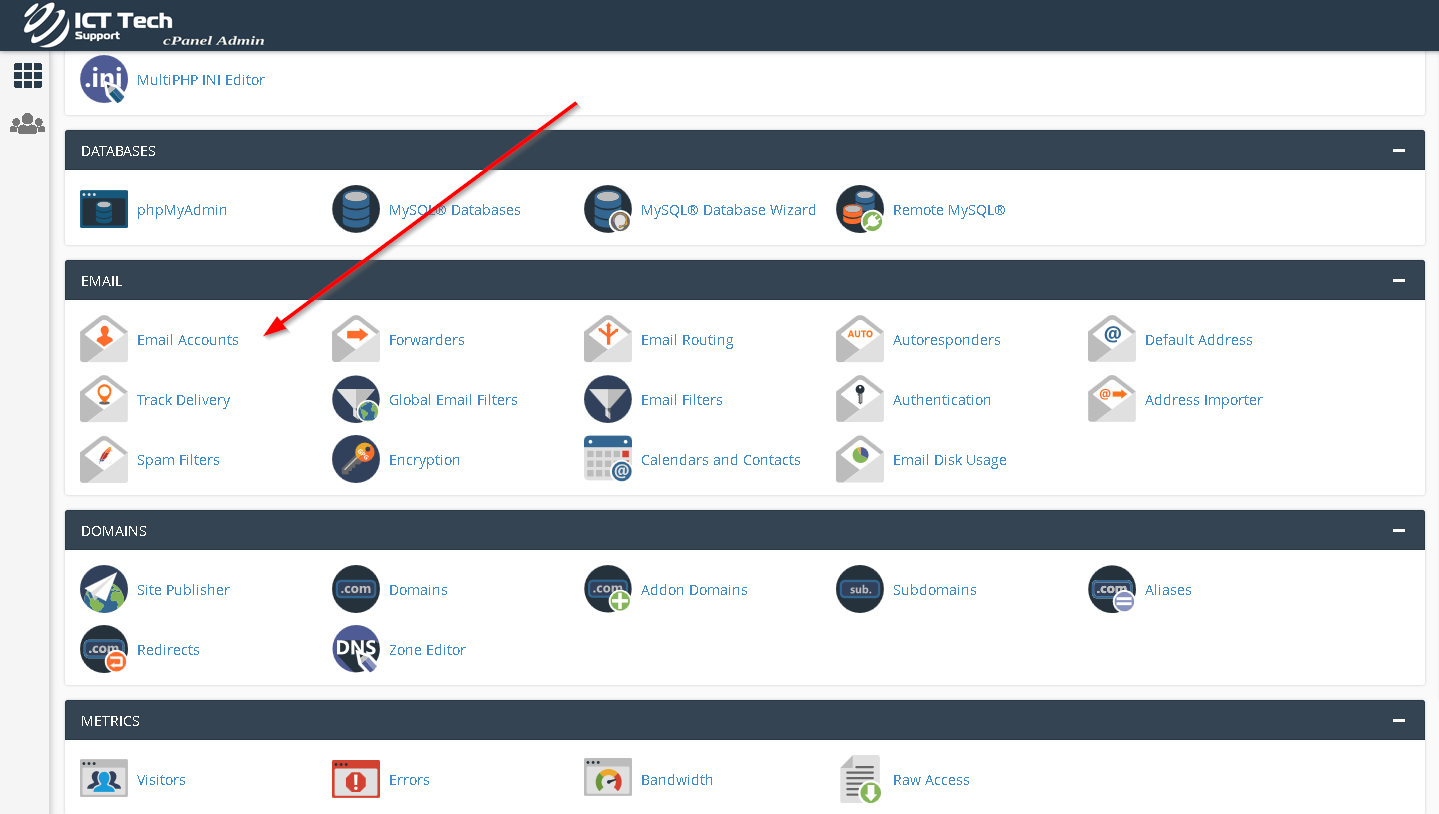
You can create a new account and generate a secure password (recommended) also note that password strenght requires a minimum of 75% secure.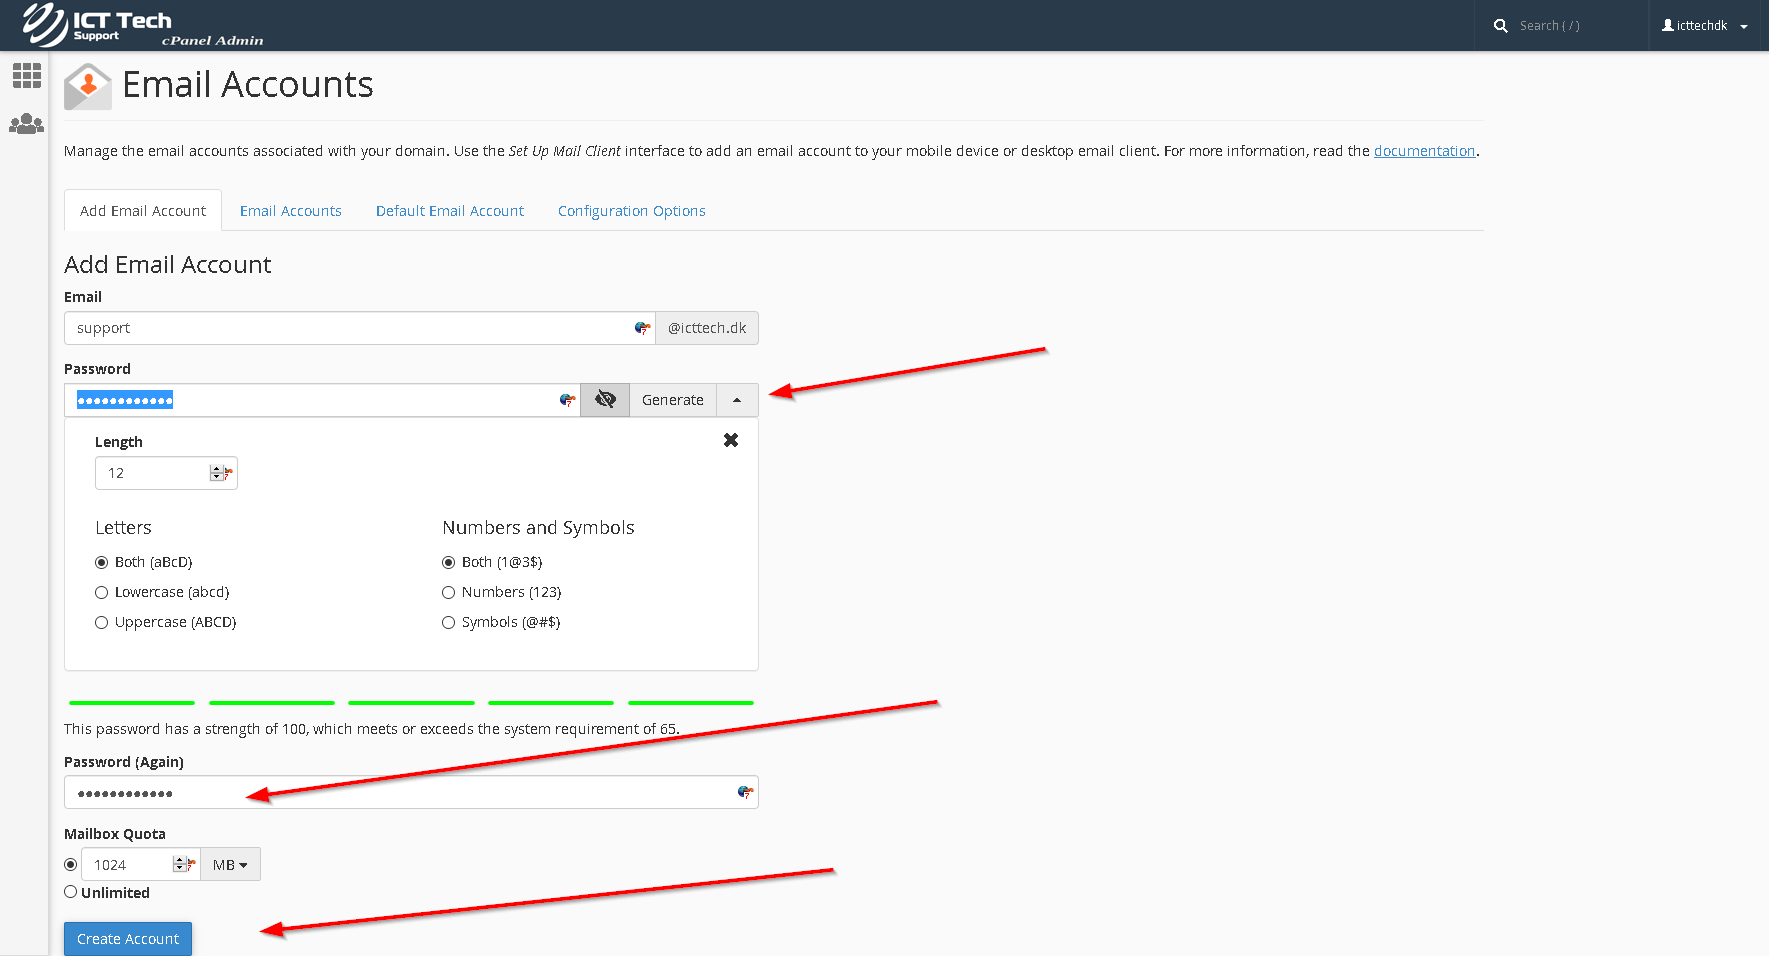
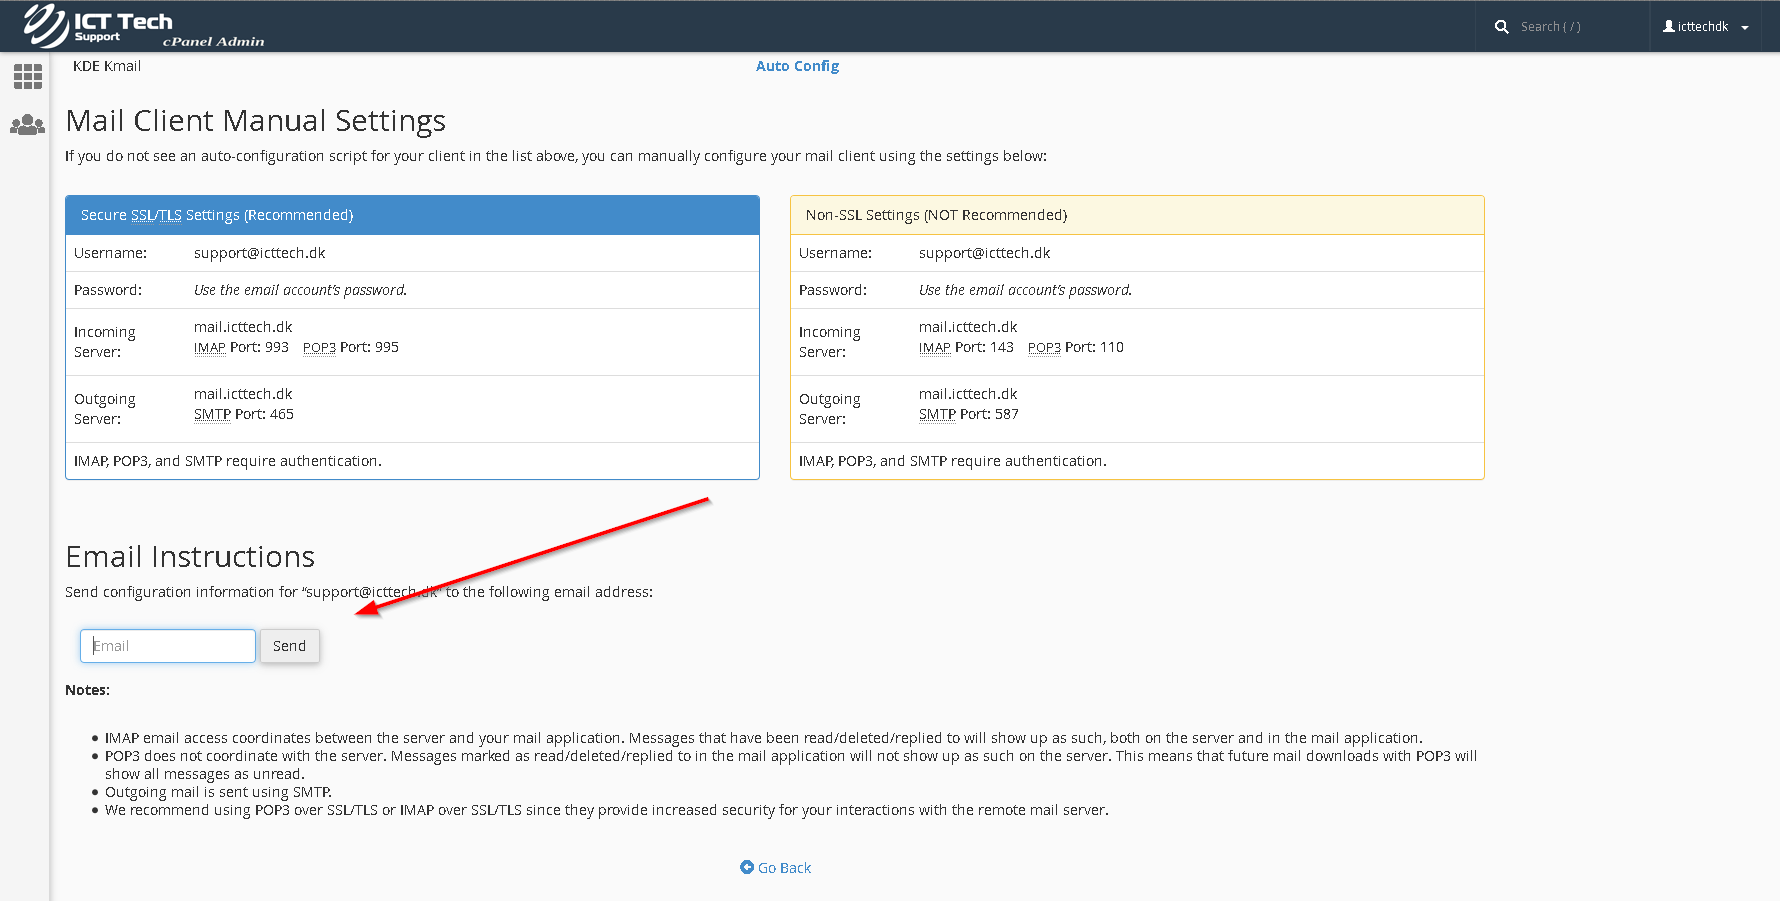
You should see a list of emails; find the email you wish to create an automatic profile for; on the right click Configure Mail Client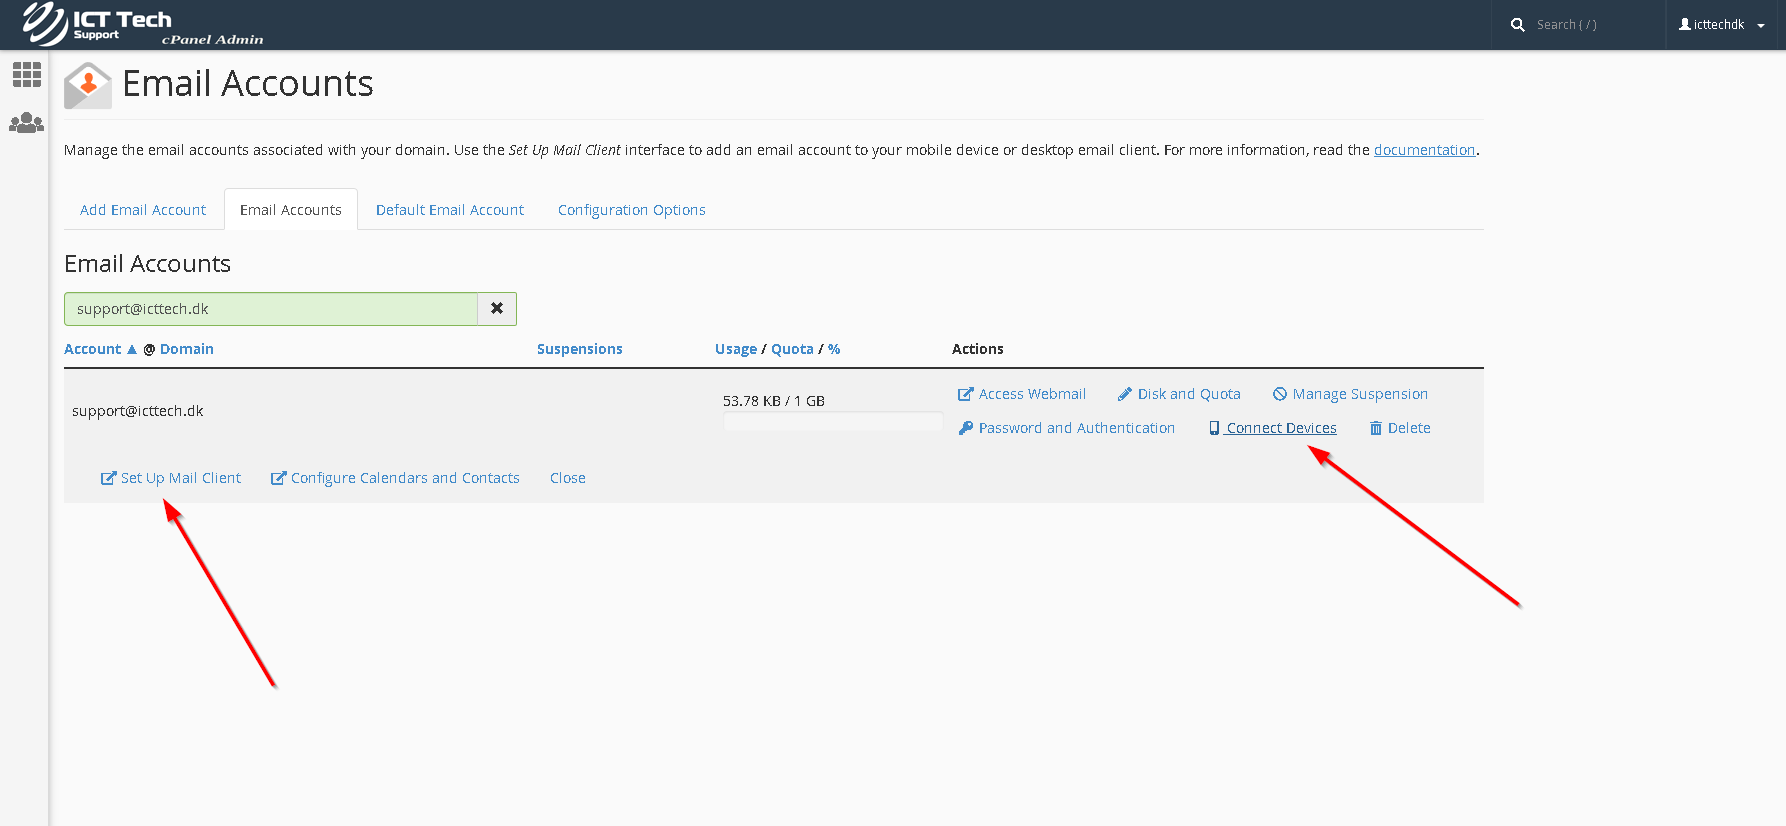
At the top under Applications you'll find "iOS for iPhone/iPad/iPod and MacOS® Mail.app® for Mountain Lion (10.8+)"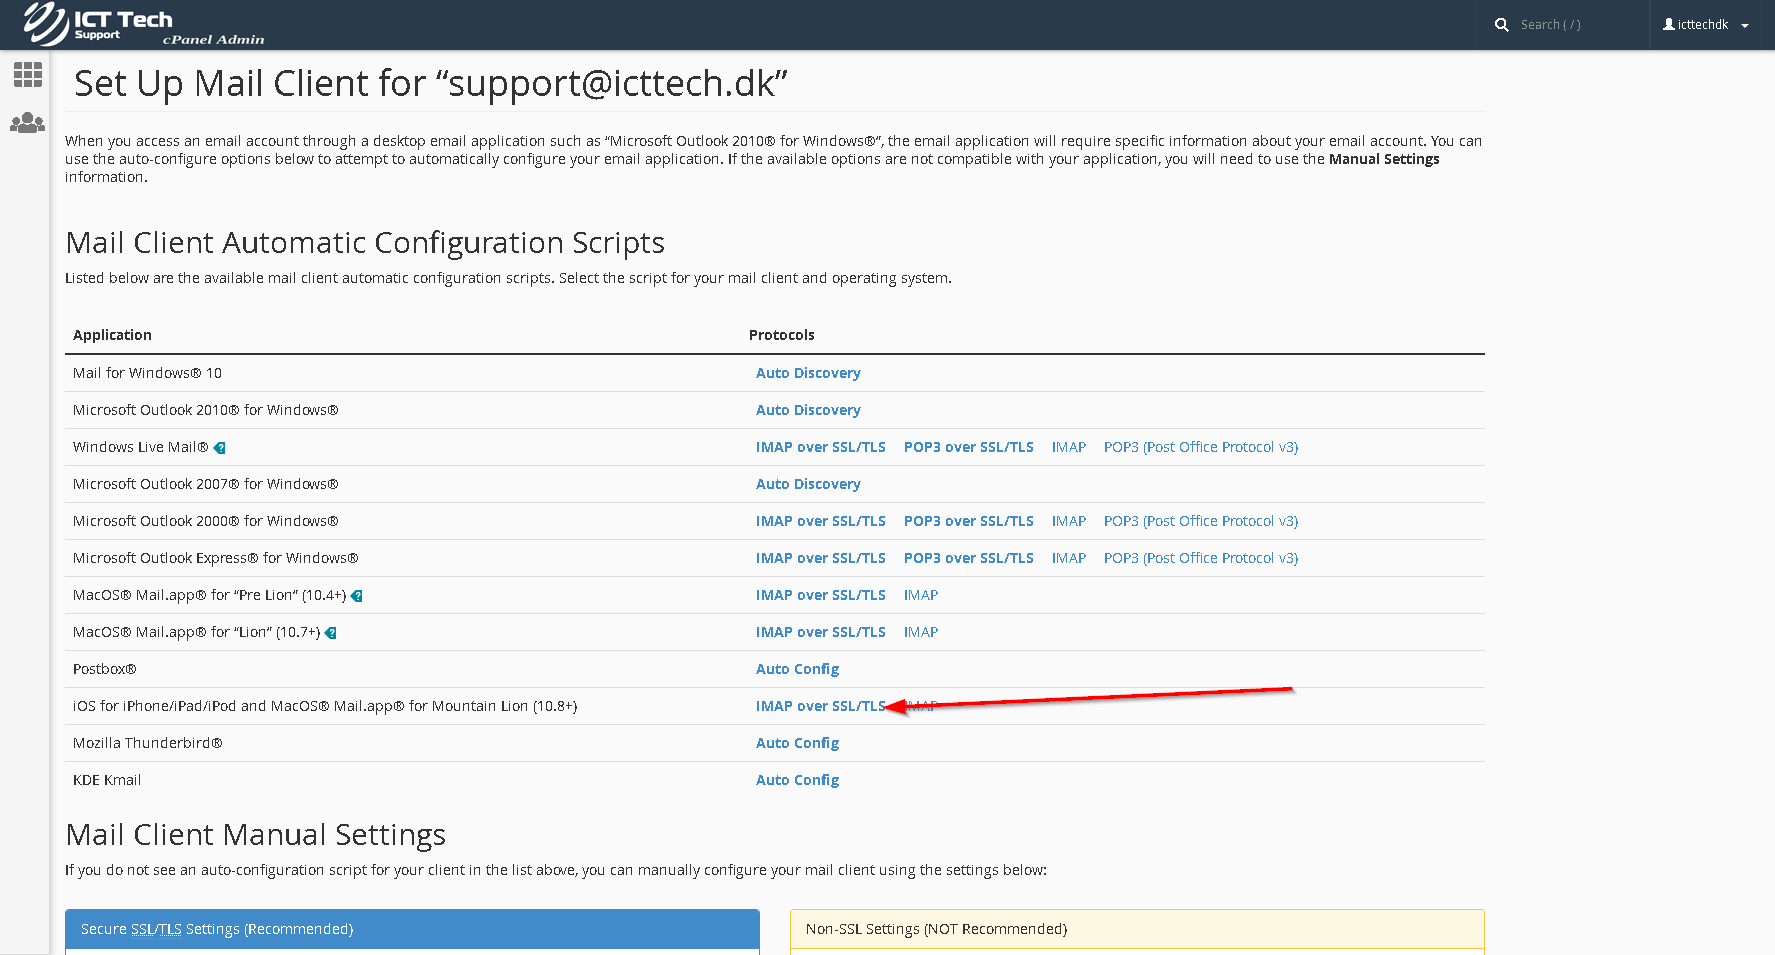
Click on IMAP over SSL/TLS and it will download a file with a name similar to account@youdomain Secure Email Setup.mobileconfig
You can send this file to any iOS device, but remember that its specific to the email account selected. (iDrive and SMS are won't open the file correctly; email it to yourself using another email address like gmail)
After the file is opened; your device will ask you for a PASSWORD or PIN CODE this is your phones / tablets and not your email password.
The next password you have to enter is for your actual email, we suggest that when you email yourself the .mobileconfig file to include your password then copy paste it into the prompt.
When that's done; you should start seeing emails populate (assuming you have any) and you can now send and receive emails.
If you already have a profile for that account setup; it should update itself with the new settings; if not follow the guide below to remove the profile manually.
To remove a configuration profile in iOS:
- On your iOS device, open .
- Scroll to the bottom and open . If you do not see a "Profiles" section, you do not have a configuration profile installed.
- In the "Profiles" section, select the profile you wish to remove and tap . If you have a passcode for your device, you will be prompted to enter it. Then tap .
To remove a configuration profile in Mac OS X:
- From the Apple menu, select .
- From the menu in System Preferences, select .
Note:won't be visible until you have at least one profile installed. - Select the profile you want to remove, and then press the (minus) button. Click to remove the profile.
