
Title: Email Account Management in the Client Area
Applies to: ictClient Area
This guide explains how to manage email mailboxes, aliases, and forwarding directly from the ictClient Area for domains hosted by us or your existing hosting service.
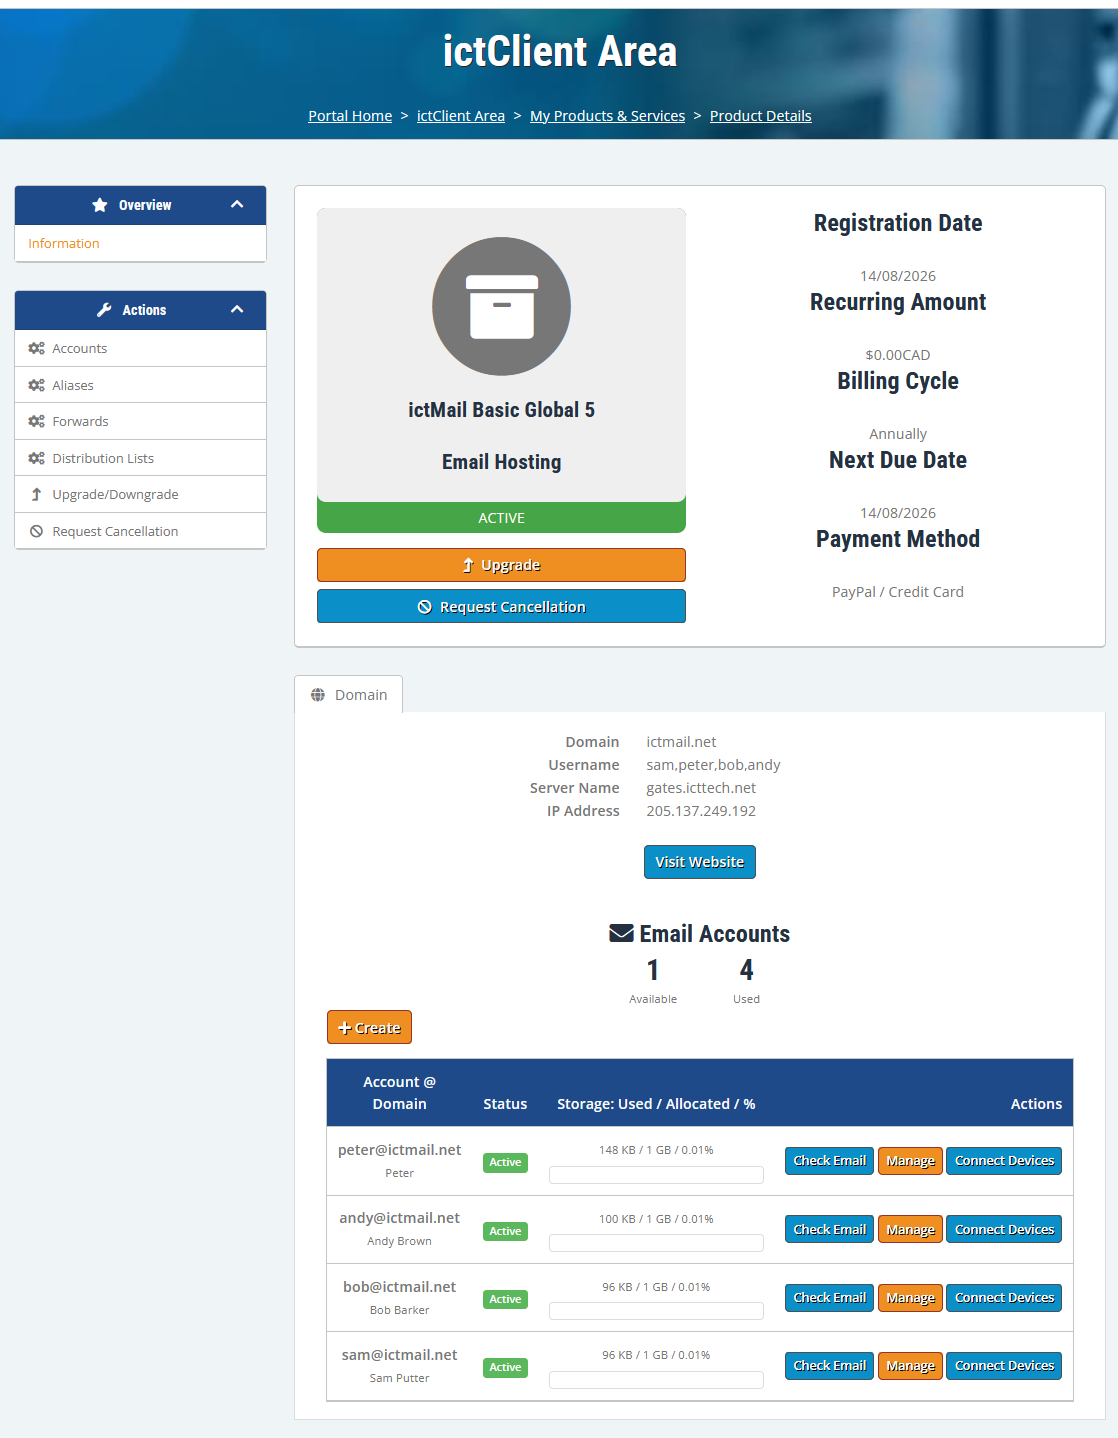
## Accessing Email Management
1. Log in to the ictClient Area.
2. Click **Services > My Services** and select your email hosting service.
3. The product details page shows the **Email Management** tabs.
## Accounts
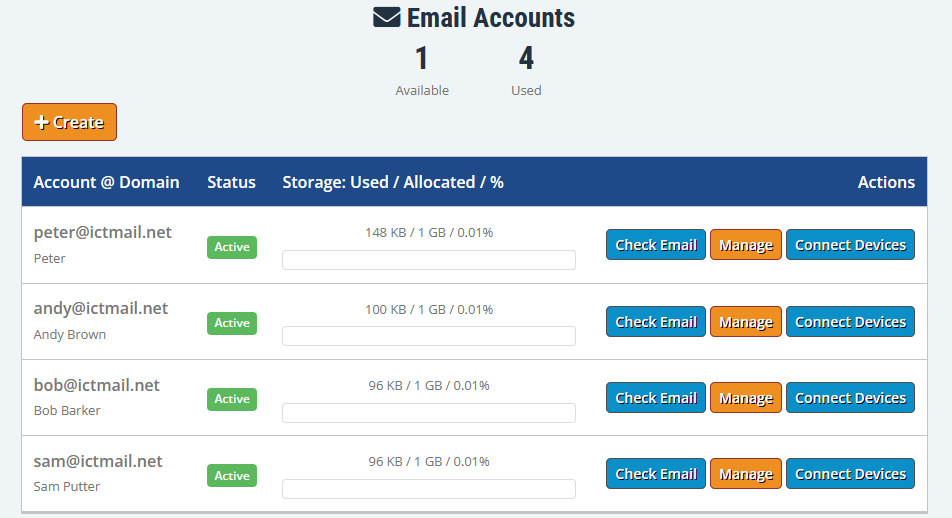
The **Accounts** tab lists all active email mailboxes for the domain. At the top of the table you can see the **Available** and **Used** mailbox counts, and a **Create** button to add a new mailbox.
The table displays the following columns:
- **Account @ Domain** — the mailbox address and optional name.
- **Status** — whether the mailbox is Active or Disabled.
- **Storage: Used / Allocated / %** — the storage used, quota, and percentage on a single line with a progress bar.
- **Actions** — buttons to **Check Email**, **Manage**, or **Connect Devices**.
### Add a New Mailbox
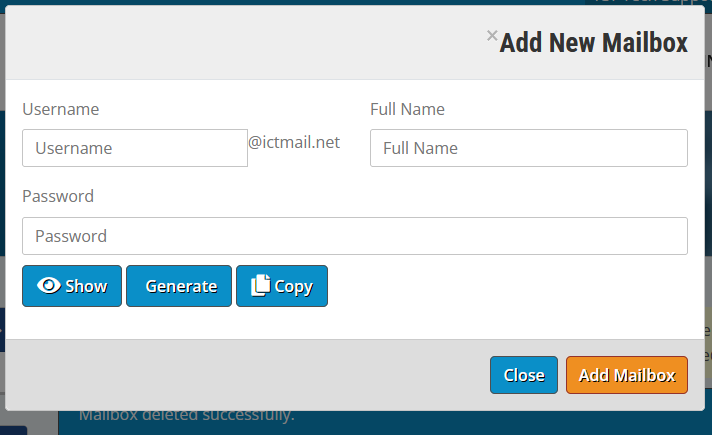
1. Click **Add New Mailbox**.
2. Enter the username (the domain is added automatically).
3. Enter a **Full Name / Real Name** (optional but recommended).
4. Enter a password or use the **Generate** button.
5. Click **Add Mailbox**.
### Manage a Mailbox
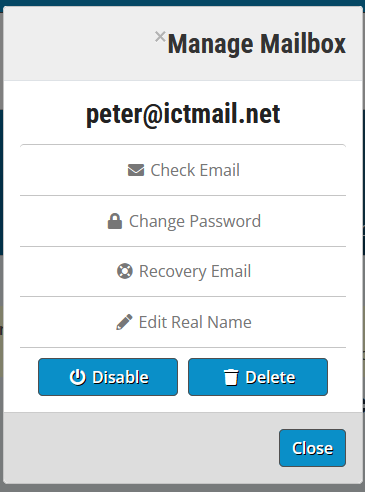
- Click **Manage** next to the mailbox.
2. A compact **Manage Mailbox** modal opens with the following options:
- **Check Email** — open the webmail login.
- **Change Password** — update the mailbox password.
- **Recovery Email** — add or remove an external recovery address.
- **Edit Real Name** — update the display name. Click it, edit the **Real Name**, and click **Save**.
- **Disable / Enable** — temporarily turn the mailbox on or off.
- **Delete** — permanently remove the mailbox. This cannot be undone.
## Connect Devices
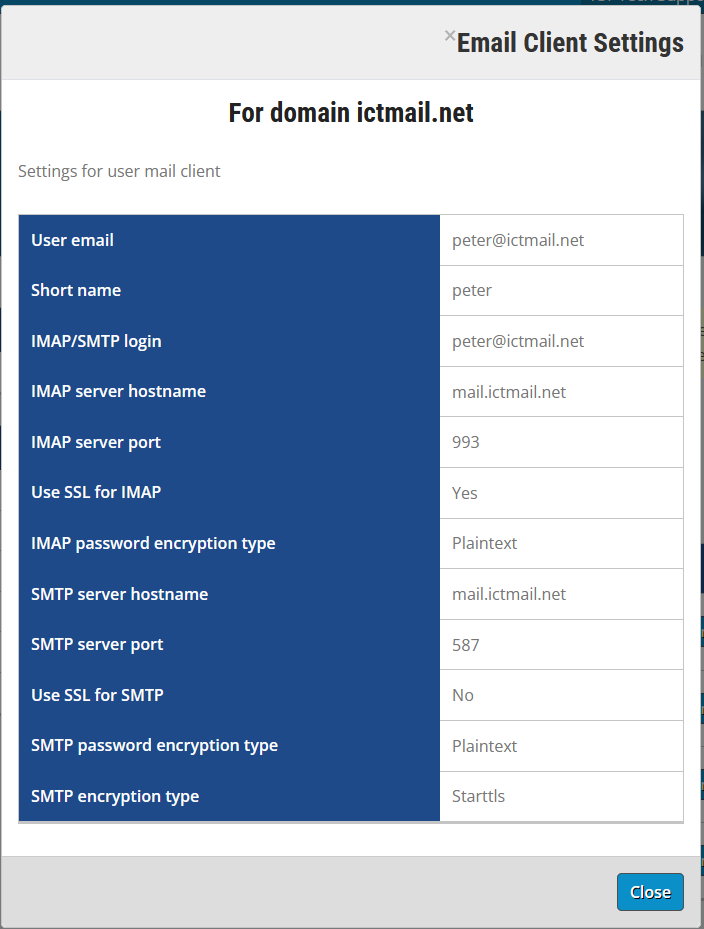
Each mailbox has a **Connect Devices** button in the **Actions** column. Clicking it opens the **Email Client Settings** modal with the IMAP and SMTP details needed to configure an email client for that account.
## Aliases
Email aliases let you receive mail at one address and have it delivered to another mailbox. For example, you can create `sales@example.com` that delivers to `info@example.com`.
1. Click the **Aliases** tab.
2. Enter the alias in the **From** field (the domain is added automatically).
3. Enter the full destination address in the **To** field.
4. Click **Add Alias**.
To remove an alias, click **Delete** next to the entry.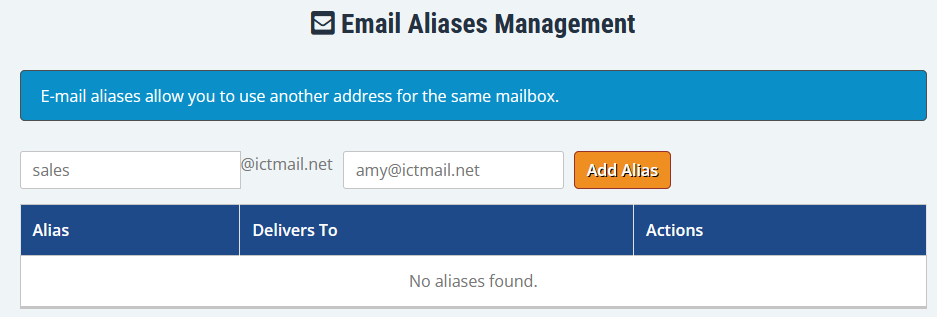
## Email Forwarding
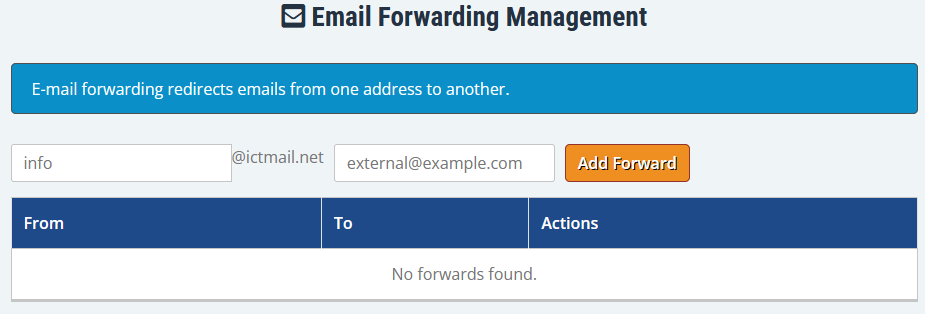
The **Forwarding** tab works similarly to aliases. Use it to forward one address to an external or internal address.
1. Click the **Forwarding** tab.
2. Enter the local address in the **From** field.
3. Enter the destination in the **To** field.
4. Click **Add Forward**.
To remove a forward, click **Delete** next to the entry.
## Distribution Lists
The **Distribution Lists** tab is currently view-only. Lists created by an administrator are shown for reference, but new lists or edits must be requested through support.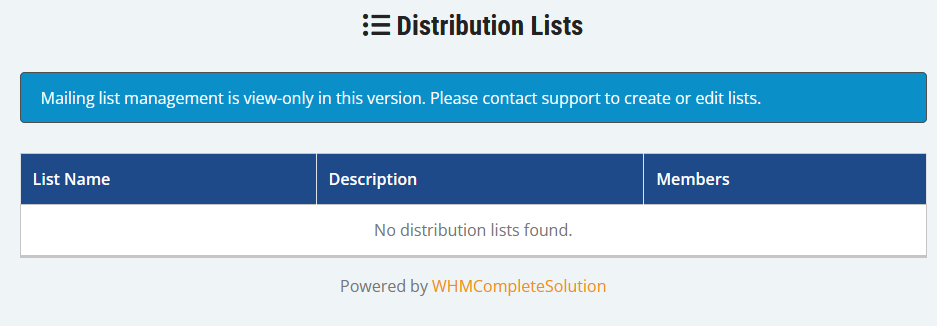
## Notes
- Only valid mailbox addresses shown in the **Accounts** tab can be used as **To** destinations for aliases or forwards.
- The **Real Name** appears in the mailbox list and is used by some mail clients as the display name.
- Passwords may only contain letters, numbers, and `# _ . - + = ,` characters.
- The **Webmail** button opens the provider's webmail login for the selected account.
- The **Connect Devices** button shows the IMAP and SMTP settings for the selected mailbox.
- The **Storage** column shows *Used / Allocated / %* on one line. An unlimited quota is shown without a percentage or progress bar.
---
If you need help with any of these steps, please open a support ticket.