
By default Personal Rooms come with a “Home Room”.

The Home Room will display as the default home page of the Personal Rooms interface each time you log into your account.

To create additional rooms select Create a Room.
It is important to note that as more rooms are created this option will appear last, or after the chronological listing of rooms.
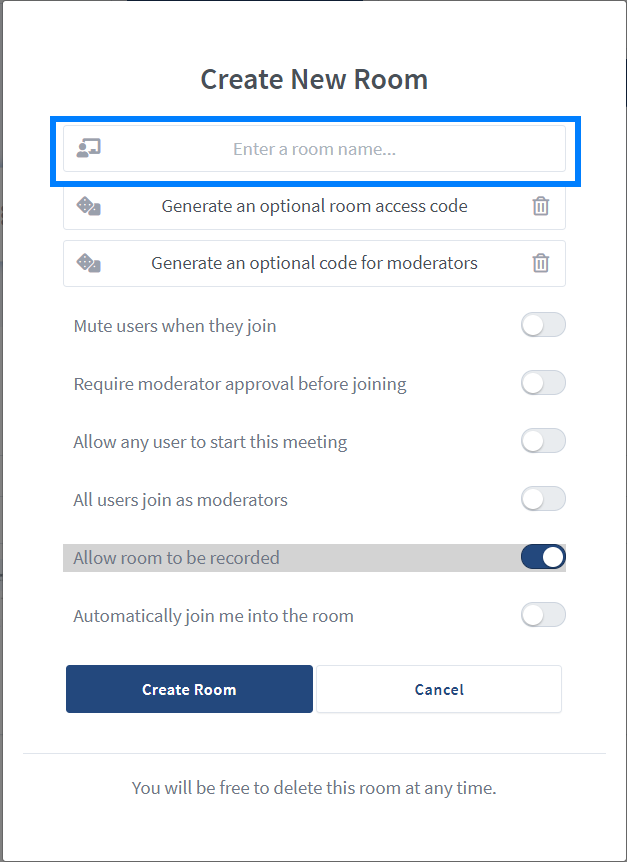
A room creator will appear where you will be prompted to Enter a Room Name .
You can also configure your room with custom settings and to meet differing use cases.
The specific room settings include:
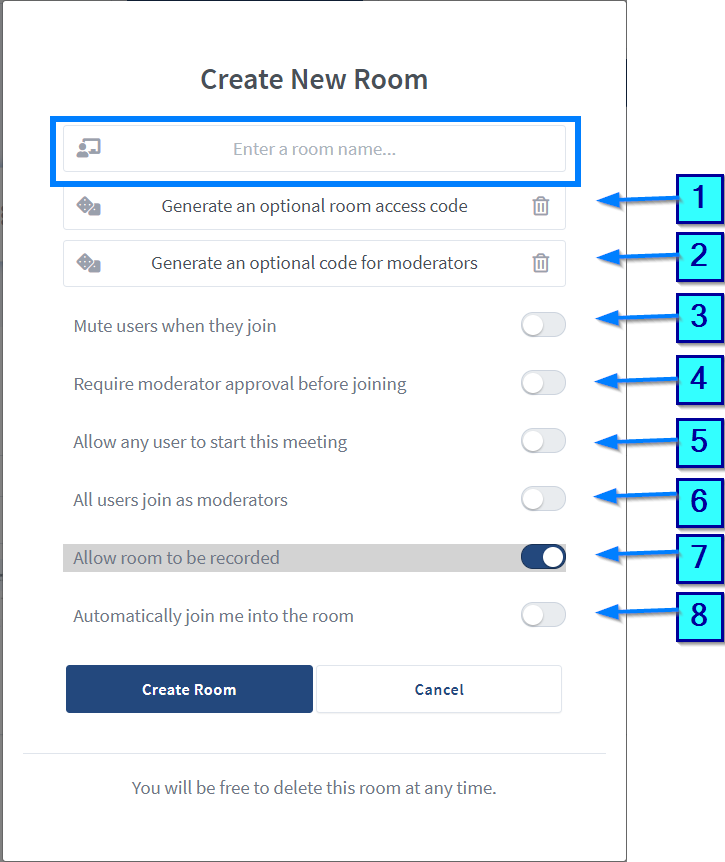
- Generate an optional room access code [1]: this feature generates an access code users must enter in order to sign into the live session.
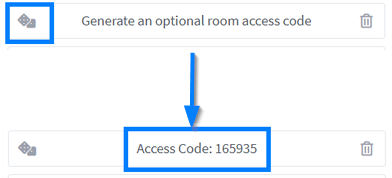
To delete or remove the access code select the trash bin icon.
- Generate an optional code for moderators [2]: this setting generates an access code that allows users to join as moderators into the live session.
- Mute users when they join [3]: this setting when enabled will automatically mute any user who joins with a microphone; it does not restrict their ability to un-mute once in the live meeting.
- Require moderator approval before joining [4]: this setting will prompt the moderator to approve the join request of a user.
![]()
When this setting is enabled, a user who attempts to join the live session will see the above message.
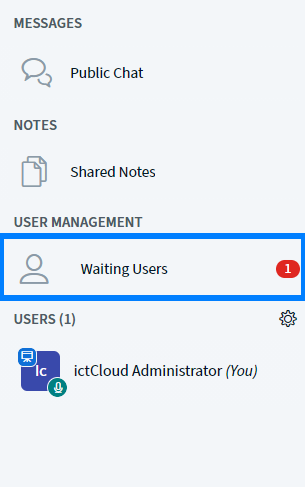
In the live session the moderator will receive a prompt to approve the join request(s) under User Management.
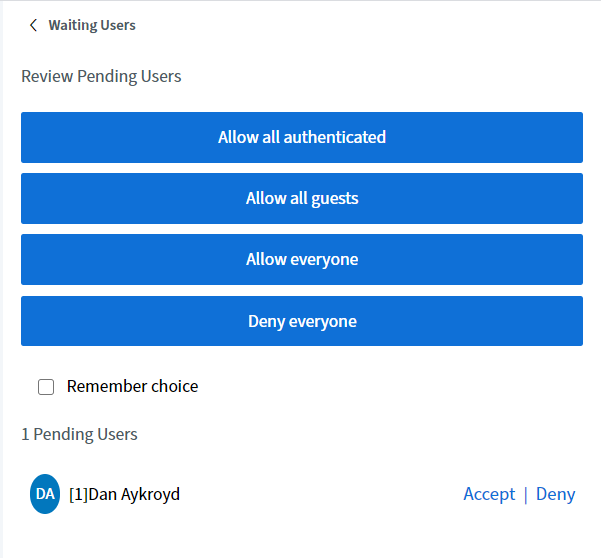
As the moderator you can allow or deny all pending join requests at once or per individual guest.
By checking remember choice all subsequent join requests will be approved or denied based on the permission granted.
- Allow any user to start this meeting [5]: by default only the room owner can start a room. When this setting is enabled all users who have access to the room link can start the room.
- All users join as moderators [6]: by default only the room owner enters the room as a moderator. This setting allows you to assign moderator privileges to all users who have the room link.
- Allow room to be recorded [7]: by default the room is not recorded or recordable. Selecting this will allow the moderator to record the meeting.
- Automatically join me into the room [8]: when selected, will automatically redirect you into the BigBlueButton meeting once the room is created.

Once you have named and configured your personal room you can then select Create Room.
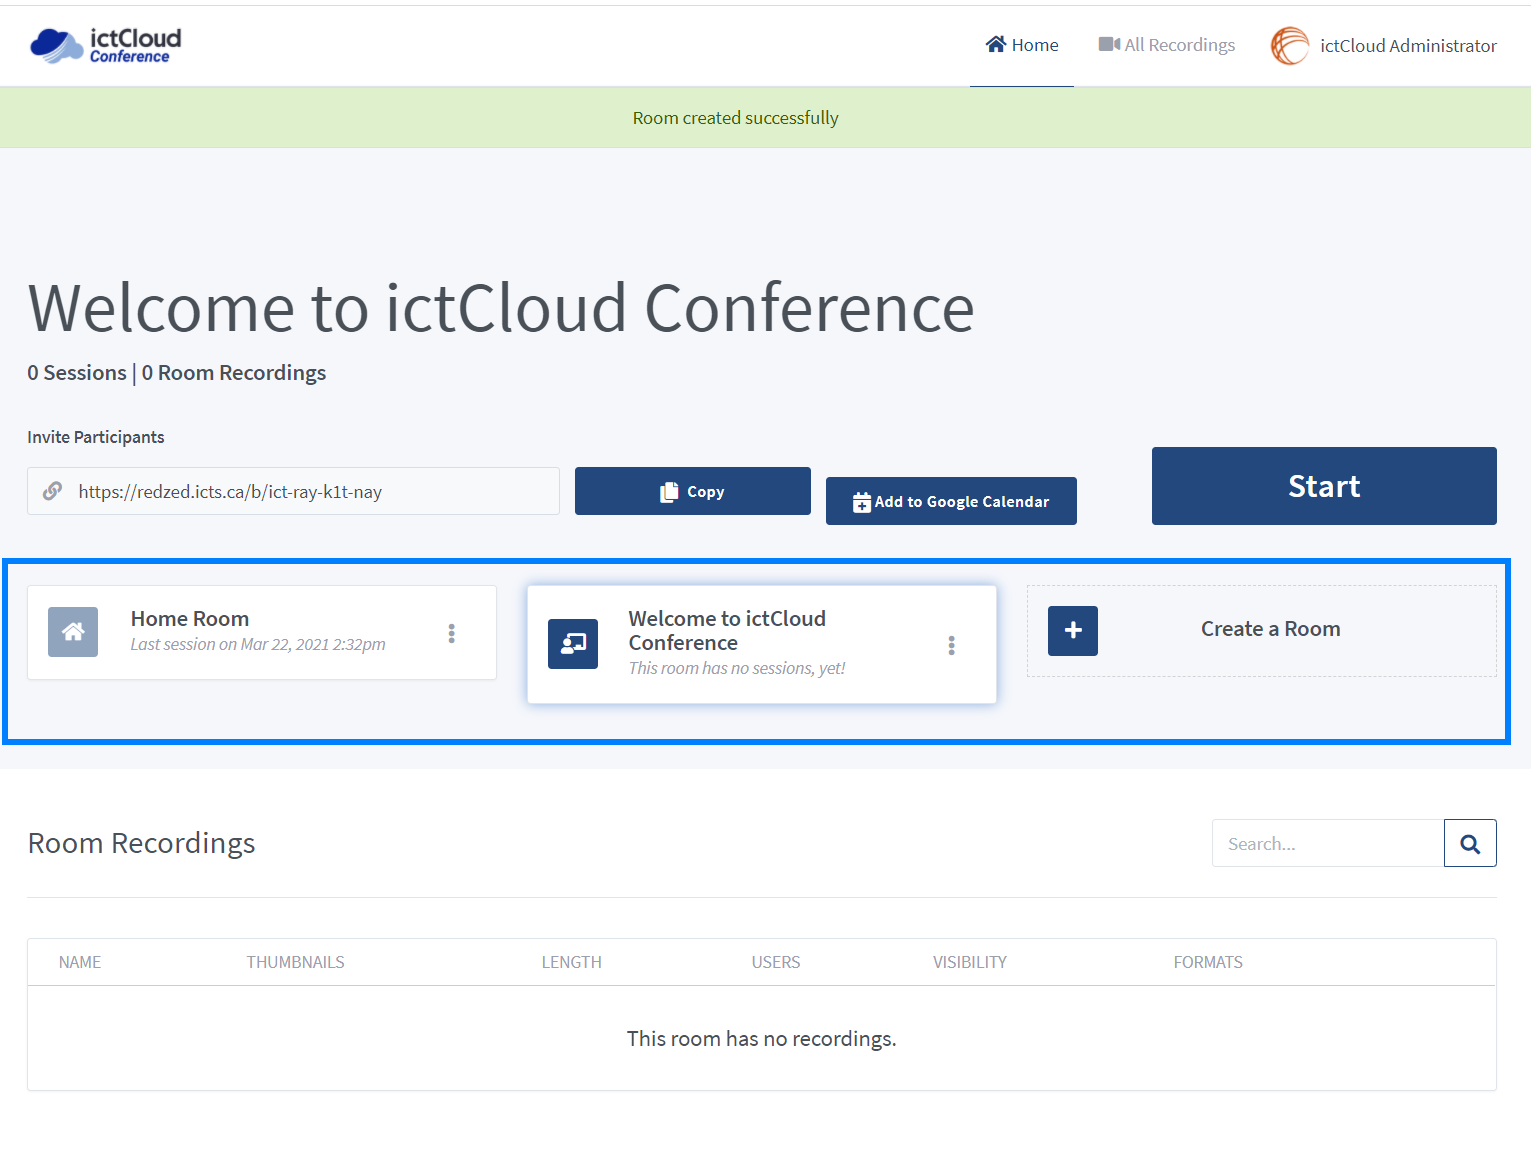
All newly created rooms will appear in the Room Manager section of the interface, and are listed and ordered based on the date they were created.
To enter a personal room that was already created or to manage a personal room, locate it in the room manager section and select it.

The Title [1] will change to indicate the current personal room. You can now launch the session by selecting Start [2].
